| |
April 2004 - Vol 6, No.
2 |
Bike Mods
Making
Way for a Fat Tire on Your Road Star: Fender Grinding
By Bill
DeFord
This information
and procedure is provided as a courtesy and is for informational
purposes only. Neither the publisher nor the author accepts any
responsibility for the accuracy of this procedure. You assume all
risks associated with the use of this information. NEITHER THE PUBLISHER
NOR THE AUTHOR SHALL IN ANY EVENT BE LIABLE FOR ANY DIRECT, INDIRECT,
PUNITIVE, SPECIAL, INCIDENTAL, OR CONSEQUENTIAL DAMAGES, OF ANY
NATURE ARISING OUT OF OR IN ANY WAY CONNECTED WITH THE USE OR MISUSE
OF THIS INFORMATION OR LACK OF INFORMATION. Any type of modification
or service work on your motorcycle should always be performed by
a professional mechanic. If performed incorrectly, this procedure
may endanger the safety of you and others on your motorcycle and
possibly invalidate your manufacturer's warranty.
IMPORTANT NOTE: This particular procedure
was performed on a motorcycle that is designated for solo riding
only. It is not intended to carry a passenger on the modified area.
Many people have asked if they need
to grind the fender brace of a Road Star to get a bigger tire on...the
answer is a definite "sometimes." As for me, I put on
a 180/55/18 in the rear and it rubbed bad...the dealer tried to
grind the fender brace, but I'm here to tell you that it is hard
to make a job look as bad as they did...and it still rubbed. I had
to re-grind what they did. Recently, I put on a new rear tire, and
it is slightly rubbing again. Since I needed to re-grind the fender
brace, I documented the process so others might be able to avoid
the "dealer thing" I went through.
The whole thing took me an hour and
15 minutes (and that included getting the tools and taking the photos).
Here's what you'll need.
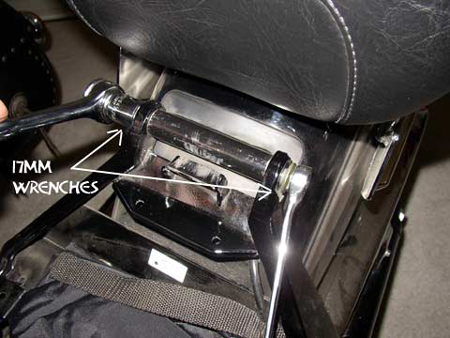
Two 17mm sockets or wrenches. The big bolt you
are going to remove is very tight, so make sure these are good quality
(and not stubbies) or you may end up rounding the bolt head/nut.
One 15mm socket or wrench.
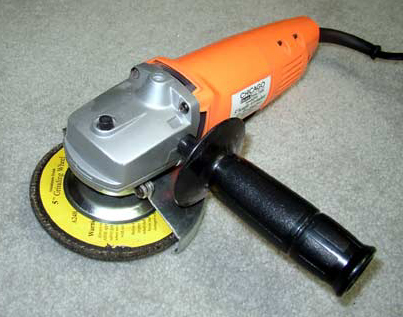
One angle grinder, as shown below. I got mine at
Harbor Freight, because I won't use it much and I didn't need an
expensive one.
 One can of a primer-type paint...your choice of
colors. I used white the first time and flat black this time.
A dremel is not necessary but can help do a "finished"
job.
One can of a primer-type paint...your choice of
colors. I used white the first time and flat black this time.
A dremel is not necessary but can help do a "finished"
job.
The Procedure
1. Remove the seat and tool kit.
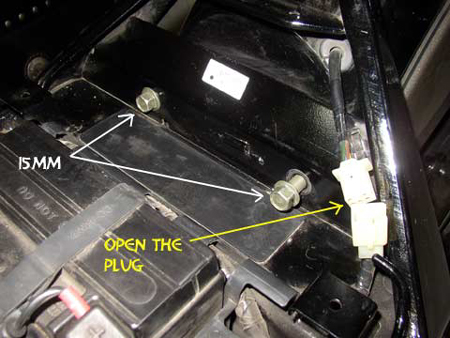
2. Remove the two small 15mm bolts and unplug the wiring harness.
3. Remove the nut from the large
bolt.
4. At this point in the procedure,
the only thing holding the fender is that big bolt, so hang on to
the fender for the rest of this. I straddled the fender and held
the weight off the fender with one hand while wiggling the big bolt
out.
5. Now lift the fender free. Watch the plug on the wiring harness
you just unplugged in step 2.
6. I layed my fender on some old rugs covered with a 100% cotton
towel. I figured putting all this on the grass would help provide
extra cushion.
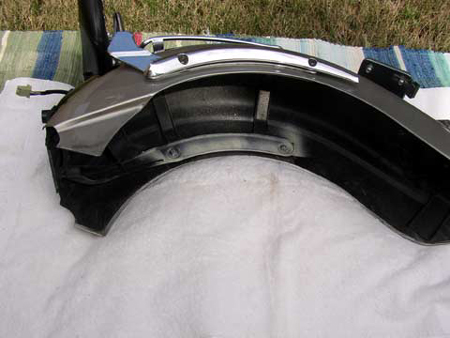
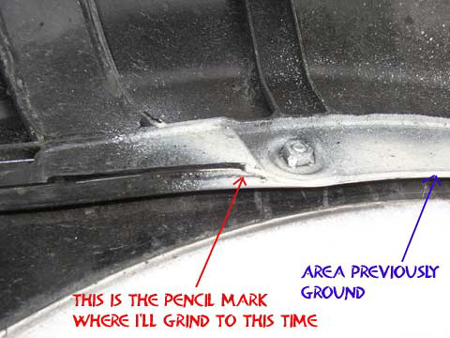
7. I marked a rough line on the area
I wanted to grind. The first time I did this I marked all the way
down the brace with a pencil. It helps me know how much progress
I'm making and when to stop grinding.
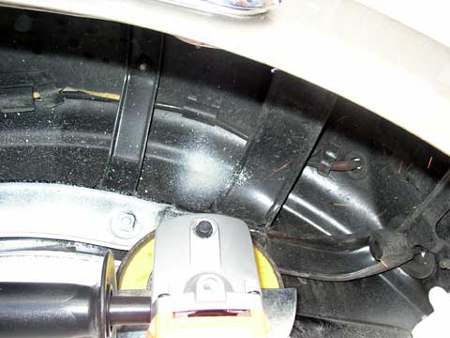
8. When you grind the brace, make
sure you don't hit anything that you don't want destroyed. Wear
goggles and a mask. These angle grinders will eat through steel
like you won't believe. If it bumps the paint, then paint there
ain't
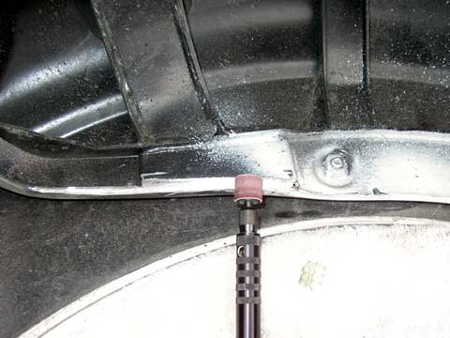
9. Now this step is not necessary
unless you are afflicted with an anal-retentive disease like me.
After grinding with the angle grinder, I used a sanding disk on
a dremel to smooth the edges. It is now smooth to the touch.
10. Once I got the grinding done,
I taped the fender to the towel so over-spray wouldn't make its
way to my paint. Then I did a couple of quick passes with the "rattle-can"
of paint. It's under the fender and doesn't have to be a work of
art

11. You're done.

Now reverse the bolt process...big
bolt first (helps if someone can slide the bolt in while you hold
the fender), two small bolts, connect the plug, tool kit back, and
seat on.
Congrats on a job well done!
IMPORTANT NOTE: When tightening the
big bolt, get it TIGHT! Otherwise, it will "bang" like
the sound of a hammer hitting your frame when you hit bumps and
make you think your bike is falling apart.
FINAL NOTE: I know there are other
ways to do this (like leaving the sub frame on the bike), but this
is the way I do it. You may have a better or different way. Hope
this helps someone. |